Introduction
Have you ever wondered what makes the perfect cream cheese filling so irresistible? Whether it’s the velvety texture, the rich flavor, or its incredible versatility, this creamy delight has a way of elevating everything from decadent desserts to savory snacks. Imagine biting into a fluffy danish with a luscious cream cheese center or spreading it over warm pancakes for a breakfast treat that feels like a hug. The best part? Making it at home is easier than you think!
In this guide, I’ll walk you through how to create the perfect cream cheese filling smooth, lump-free, and bursting with flavor. Whether you’re a baking enthusiast or a beginner, this recipe will become your go-to for adding a touch of indulgence to your favorite dishes. Ready to get started? Let’s dive in and unlock the magic of homemade cream cheese filling!
What is Cream Cheese Filling?
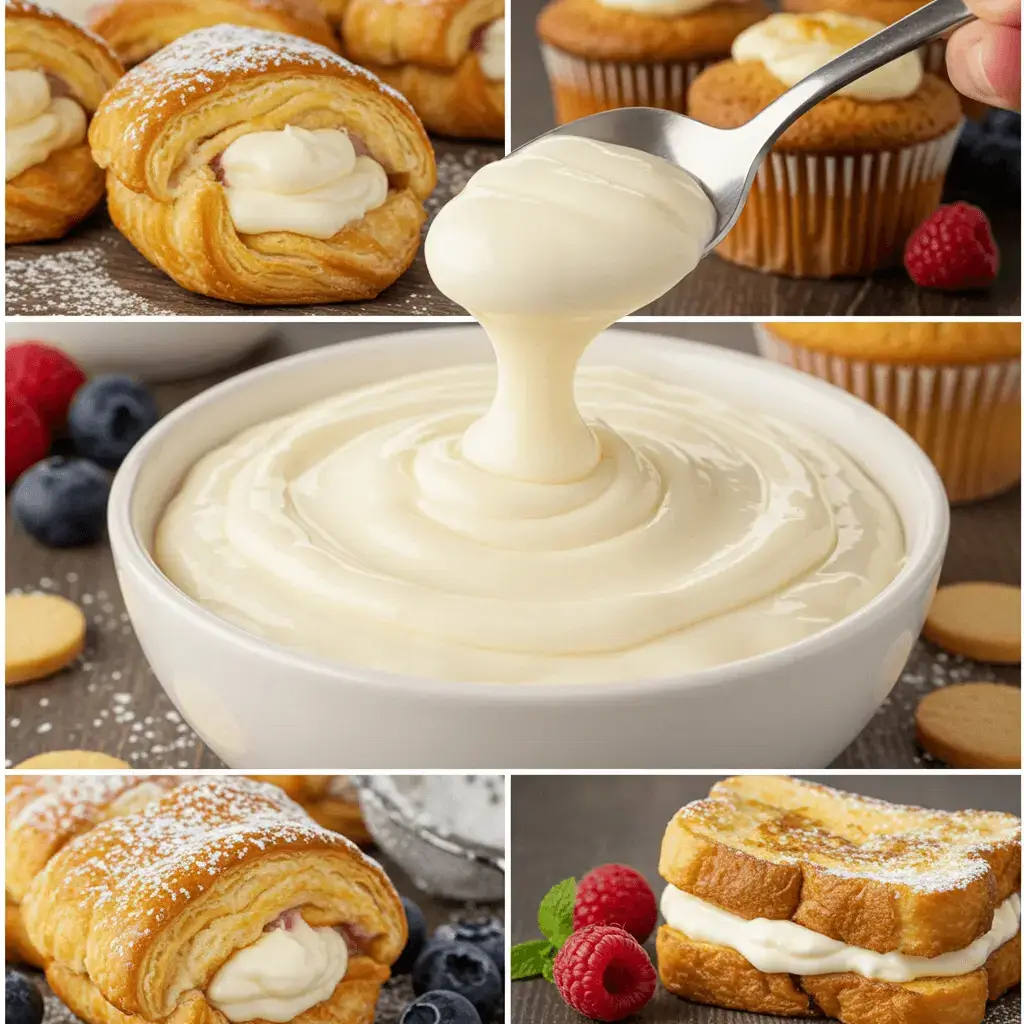
Cream cheese filling is the unsung hero of the culinary world a creamy, dreamy mixture that can transform ordinary dishes into extraordinary creations. Whether you’re baking a decadent cheesecake, stuffing fluffy pastries, or whipping up a batch of stuffed French toast, this versatile filling adds a rich, velvety touch that’s hard to resist. But what exactly makes it so special? Let’s break it down.
The Versatility of Cream Cheese Filling
Cream cheese filling is like a blank canvas it can be sweet, savory, or anything in between. Its adaptability makes it a favorite among home cooks and professional bakers alike. Here are just a few ways you can use it:
- Sweet Treats: Think cheesecakes, danishes, cupcakes, and cookies. A dollop of cream cheese filling can turn a simple dessert into a showstopper.
- Breakfast Delights: Spread it on pancakes, waffles, or stuffed French toast for a luxurious morning treat.
- Savory Dishes: Mix in herbs, garlic, or spices, and use it as a filling for stuffed mushrooms, pastries, or even as a dip for veggies.
The possibilities are endless, and once you master the basics, you’ll find yourself reaching for this filling again and again.
Why Cream Cheese Filling is a Kitchen Staple
So, what makes cream cheese filling a must-have in your kitchen? Let’s talk about its winning qualities:
- Creamy Texture: The smooth, velvety consistency is unmatched. It’s rich without being heavy, making it perfect for both light and indulgent dishes.
- Balanced Flavor: Cream cheese has a mild tanginess that pairs beautifully with sweet and savory ingredients. It’s like the Goldilocks of fillings just right!
- Easy to Make: With just a handful of ingredients and a few minutes of prep, you can whip up a batch of cream cheese filling that rivals any store-bought version.
Plus, it’s incredibly forgiving. Even if you’re new to baking, you’ll find that making cream cheese filling is a breeze. And the best part? You can customize it to suit your taste. Want it sweeter? Add a bit more powdered sugar. Prefer a tangy kick? A splash of lemon juice will do the trick.
A Brief History of Cream Cheese Filling
Did you know that cream cheese itself has been around since the 1800s? Originally created in New York, it quickly became a beloved ingredient in American kitchens. Over time, creative cooks began using it as a filling for pastries, cakes, and more, giving rise to the creamy, dreamy concoction we know and love today.
From classic New York-style cheesecake to modern twists like cream cheese-filled croissants, this filling has stood the test of time. It’s a testament to how something so simple can become a cornerstone of culinary creativity.
Why You’ll Love This Cream Cheese Filling
- Perfect Consistency: Smooth, lump-free, and easy to spread or pipe.
- Customizable: Adjust the sweetness or add flavors to match your recipe.
- Crowd-Pleasing: Whether you’re serving it at a party or enjoying it at home, it’s always a hit.
Now that you know what makes cream cheese filling so special, let’s dive into the ingredients and steps to create your own perfect batch. Trust me, once you try it, you’ll wonder how you ever baked without it!
Essential Ingredients for Perfect Cream Cheese Filling
Creating the perfect cream cheese filling starts with gathering the right ingredients. Think of it as building a foundation each component plays a crucial role in achieving that smooth, creamy texture and balanced flavor we all love. Whether you’re a seasoned baker or a beginner, understanding these ingredients will help you master this versatile filling. Let’s dive in!
The Core Ingredients
At the heart of every great cream cheese filling are a few simple yet essential ingredients. Here’s what you’ll need:
- Cream Cheese:
- The star of the show! Opt for full-fat cream cheese for the richest, creamiest texture. Brands like Philadelphia work wonderfully, but any high-quality cream cheese will do.
- Pro Tip: Make sure your cream cheese is at room temperature before mixing. This ensures a smooth, lump-free filling.
- Powdered Sugar:
- Also known as confectioners’ sugar, this sweetens the filling without the grittiness of granulated sugar.
- Pro Tip: Sift the powdered sugar before adding it to avoid clumps.
- Vanilla Extract:
- A splash of vanilla enhances the flavor, adding a warm, aromatic note that complements the tanginess of the cream cheese.
- Pro Tip: Use pure vanilla extract for the best flavor.
- Butter (Optional):
- Adding a small amount of softened butter can make the filling even creamier and easier to spread.
- Pro Tip: If using butter, ensure it’s unsalted to control the overall flavor.
Optional Add-Ins for Flavor Variations
One of the best things about cream cheese filling is how customizable it is. Depending on your recipe or personal preference, you can tweak the flavor to create something truly unique. Here are some ideas:
- Sweet Variations:
- Lemon Zest: Add a bright, citrusy note for a refreshing twist.
- Cocoa Powder: Turn it into a chocolate cream cheese filling for decadent desserts.
- Fruit Purees: Mix in strawberry, raspberry, or mango puree for a fruity flavor.
- Savory Variations:
- Herbs: Stir in fresh chives, dill, or parsley for a savory filling perfect for pastries or dips.
- Garlic and Onion Powder: Add a pinch for a flavorful spread on bagels or crackers.
- Spices: Try a dash of smoked paprika or cayenne for a subtle kick.
- Dietary Adaptations:
- Vegan Cream Cheese: Use a plant-based alternative for a dairy-free version.
- Sugar Substitutes: Swap powdered sugar with a low-carb sweetener like erythritol for a keto-friendly option.
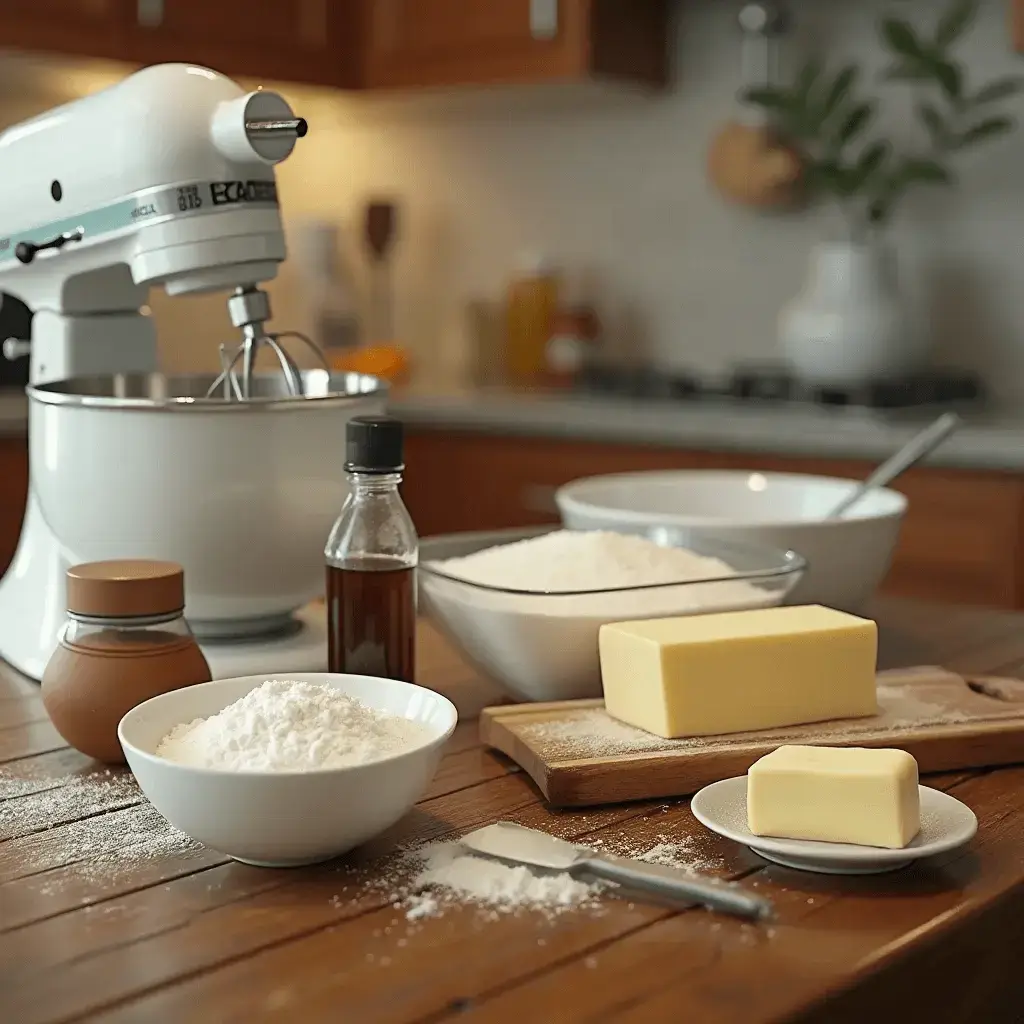
Tools You’ll Need
While the ingredients are simple, having the right tools on hand can make the process even easier:
- Hand Mixer or Stand Mixer: For achieving that perfectly smooth texture.
- Rubber Spatula: To scrape down the sides of the bowl and ensure everything is well combined.
- Measuring Cups and Spoons: For accurate ingredient measurements.
- Sifter: To remove lumps from powdered sugar.
Why These Ingredients Work Together
Each ingredient in cream cheese filling has a specific role:
- Cream Cheese provides the base with its rich, tangy flavor.
- Powdered Sugar adds sweetness and helps create a smooth texture.
- Vanilla Extract enhances the overall flavor profile.
- Butter (if used) adds extra creaminess and richness.
When combined, they create a filling that’s not only delicious but also incredibly versatile. Whether you’re making a dessert or a savory dish, these ingredients ensure your cream cheese filling is always a hit.
Quick Ingredient Checklist
Before you start, make sure you have:
- 8 oz (225g) cream cheese, room temperature
- 1 cup (120g) powdered sugar, sifted
- 1 tsp vanilla extract
- 2 tbsp unsalted butter, softened (optional)
Now that you’ve got your ingredients ready, let’s move on to the step-by-step process of making the perfect cream cheese filling. Trust me, it’s easier than you think, and the results are absolutely worth it!
Step-by-Step Guide to Making Cream Cheese Filling
Ready to whip up the perfect cream cheese filling? Whether you’re a baking pro or a beginner, this step-by-step guide will walk you through the process with ease. By the end, you’ll have a smooth, creamy, and utterly delicious filling that’s ready to elevate your favorite recipes. Let’s get started!
Preparing Your Ingredients
Before you begin, it’s important to set yourself up for success. Here’s how to prep your ingredients for the best results:
- Bring Cream Cheese to Room Temperature:
- Take your cream cheese out of the fridge at least 30 minutes before you start. Room-temperature cream cheese blends more easily, ensuring a smooth, lump-free filling.
- Pro Tip: If you’re short on time, cut the cream cheese into small cubes to help it soften faster.
- Sift the Powdered Sugar:
- Sifting removes any lumps and ensures your filling is silky smooth.
- Pro Tip: If you don’t have a sifter, use a fine-mesh strainer or whisk the powdered sugar vigorously before adding it.
- Gather Your Tools:
- You’ll need a hand mixer or stand mixer, a rubber spatula, and a mixing bowl. Having everything ready will make the process seamless.
Mixing and Achieving the Perfect Consistency
Now that your ingredients are prepped, it’s time to mix them into the perfect cream cheese filling. Follow these steps for flawless results:
- Beat the Cream Cheese:
- Place the softened cream cheese in a mixing bowl and beat it on medium speed for 1-2 minutes until it’s smooth and creamy.
- Pro Tip: Scrape down the sides of the bowl with a rubber spatula to ensure even mixing.
- Add the Powdered Sugar Gradually:
- With the mixer on low speed, slowly add the sifted powdered sugar. This prevents a cloud of sugar dust and helps the ingredients incorporate evenly.
- Once all the sugar is added, increase the speed to medium and beat for another 1-2 minutes until the mixture is light and fluffy.
- Incorporate the Vanilla Extract (and Butter, if using):
- Add the vanilla extract and softened butter (if using) to the mixture. Beat on medium speed until everything is well combined and the filling is smooth.
- Pro Tip: If you’re adding any flavor variations (like lemon zest or cocoa powder), mix them in at this stage.
- Check the Consistency:
- Your cream cheese filling should be thick but spreadable, with a velvety texture. If it’s too thick, you can add a splash of milk or cream to loosen it up.
Taste Testing and Adjustments
The final step is all about making sure your cream cheese filling tastes just right. Here’s how to perfect the flavor:
- Taste and Adjust:
- Give your filling a quick taste. If you prefer it sweeter, add a bit more powdered sugar. For a tangier flavor, a squeeze of lemon juice works wonders.
- Pro Tip: If you’re using the filling for a specific recipe (like a cheesecake or danish), consider how it will pair with the other flavors and adjust accordingly.
- Chill if Needed:
- If your filling feels too soft, pop it in the fridge for 15-20 minutes to firm up slightly. This is especially helpful if you’re using it as a filling for pastries or cakes.
Quick Troubleshooting Tips
- Lumpy Filling? Make sure your cream cheese is fully softened before mixing. If lumps persist, strain the filling through a fine-mesh sieve.
- Too Sweet? Balance the sweetness with a pinch of salt or a splash of lemon juice.
- Too Thin? Chill the filling in the fridge for 15-20 minutes to thicken it up.
Why This Method Works
This step-by-step approach ensures that your cream cheese filling is smooth, creamy, and perfectly balanced. By taking the time to prep your ingredients and mix them properly, you’ll avoid common pitfalls like lumps or uneven textures. Plus, the flexibility to adjust flavors means you can customize the filling to suit any recipe or preference.
What’s Next?
Now that your cream cheese filling is ready, it’s time to put it to use! Whether you’re filling pastries, topping cupcakes, or spreading it on breakfast treats, this versatile filling is sure to impress. Stay tuned for creative ways to use it in your favorite recipes! here
Creative Ways to Use Cream Cheese Filling

Now that you’ve mastered the art of making the perfect cream cheese filling, it’s time to put it to work! This versatile filling is like a secret weapon in the kitchen it can transform ordinary dishes into extraordinary creations. Whether you’re craving something sweet, savory, or somewhere in between, here are some delicious and creative ways to use your cream cheese filling. Let’s get inspired!
Sweet Applications
Cream cheese filling shines in desserts, adding a rich, creamy element that balances sweetness perfectly. Here are some irresistible ideas:
- Cheesecakes:
- Use it as the base for a classic New York-style cheesecake or mini cheesecake bites.
- Pro Tip: Swirl in fruit puree or chocolate for a marbled effect.
- Pastries and Danishes:
- Fill puff pastry or crescent rolls with cream cheese filling, then bake until golden and flaky.
- Pro Tip: Top with fresh berries or a drizzle of glaze for extra flair.
- Stuffed Cookies:
- Sandwich cream cheese filling between two soft cookies (like red velvet or oatmeal) for a decadent treat.
- Pro Tip: Roll the edges in crushed nuts or sprinkles for added texture.
- Cupcakes and Cakes:
- Pipe cream cheese filling into the center of cupcakes or use it as a layer in cakes for a surprise burst of flavor.
- Pro Tip: Pair with carrot cake or chocolate cake for a classic combination.
- Pancakes and French Toast:
- Spread cream cheese filling between pancake layers or stuff it into French toast for a luxurious breakfast.
- Pro Tip: Drizzle with maple syrup or honey for the ultimate indulgence.
Savory Applications
Don’t limit cream cheese filling to desserts it’s just as amazing in savory dishes! Here’s how to use it for a flavorful twist:
- Stuffed Mushrooms:
- Mix cream cheese filling with garlic, herbs, and breadcrumbs, then stuff into mushroom caps and bake.
- Pro Tip: Add cooked bacon bits (or a vegetarian alternative) for extra depth.
- Savory Pastries:
- Fill puff pastry with cream cheese filling mixed with spinach, sun-dried tomatoes, or caramelized onions.
- Pro Tip: Brush the pastries with an egg wash before baking for a golden finish.
- Dips and Spreads:
- Whip cream cheese filling with herbs, garlic, and a splash of lemon juice for a quick and tasty dip.
- Pro Tip: Serve with crackers, veggie sticks, or toasted baguette slices.
- Stuffed Chicken Breast:
- Spread cream cheese filling over chicken breasts, then roll them up with spinach or prosciutto before baking.
- Pro Tip: Secure with toothpicks and season with your favorite spices.
- Bagels and Sandwiches:
- Use cream cheese filling as a spread for bagels or as a creamy layer in sandwiches.
- Pro Tip: Add smoked salmon, cucumber slices, or avocado for a gourmet touch.
Seasonal and Festive Ideas
Cream cheese filling is perfect for adding a special touch to holiday and seasonal recipes. Here are some festive ideas:
- Holiday Desserts:
- Use cream cheese filling in pumpkin rolls, gingerbread cookies, or festive tarts.
- Pro Tip: Add a dash of cinnamon or nutmeg for a warm, spiced flavor.
- Easter Treats:
- Fill Easter-themed pastries or cookies with cream cheese filling for a delightful surprise.
- Pro Tip: Use pastel-colored frosting or sprinkles to match the theme.
- Summer Desserts:
- Pair cream cheese filling with fresh berries, peaches, or mango for a light and refreshing dessert.
- Pro Tip: Serve in parfait glasses or as a filling for crepes.
- Winter Comfort Foods:
- Use cream cheese filling in warm, comforting desserts like bread pudding or stuffed French toast.
- Pro Tip: Add a sprinkle of powdered sugar or a drizzle of caramel sauce for extra coziness.
Why Cream Cheese Filling is a Game-Changer
- Versatility: It works in both sweet and savory dishes, making it a must-have in your recipe arsenal.
- Customizable: Easily adapt the flavor to suit any dish or occasion.
- Crowd-Pleasing: Whether you’re serving it at a party or enjoying it at home, it’s always a hit.
Quick Tips for Using Cream Cheese Filling
- Storage: Keep leftover filling in an airtight container in the fridge for up to 5 days.
- Freezing: Freeze in small portions for up to 2 months. Thaw in the fridge before using.
- Presentation: Use a piping bag for neat, professional-looking applications in pastries or desserts.
Now that you’ve got all these creative ideas, it’s time to roll up your sleeves and start experimenting! Whether you’re baking for a special occasion or just treating yourself, cream cheese filling is sure to make every dish unforgettable.
Tips for Storing and Preserving Cream Cheese Filling
So, you’ve whipped up a batch of delicious cream cheese filling now what? Proper storage is key to keeping it fresh, creamy, and ready to use whenever inspiration strikes. Whether you’re planning to use it right away or save it for later, these tips will help you store and preserve your cream cheese filling like a pro. Let’s dive in!
Proper Storage Techniques
To keep your cream cheese filling at its best, follow these simple storage guidelines:
- Use an Airtight Container:
- Transfer the filling to an airtight container to prevent it from absorbing odors or drying out.
- Pro Tip: Glass containers with tight-fitting lids work best for maintaining freshness.
- Refrigerate Promptly:
- Cream cheese filling should always be stored in the fridge. It will stay fresh for up to 5 days when properly refrigerated.
- Pro Tip: Label the container with the date so you know when it was made.
- Keep It Covered:
- If you’re using the filling within a day or two, you can cover the bowl with plastic wrap, pressing it directly onto the surface of the filling to prevent a skin from forming.
- Avoid Temperature Fluctuations:
- Store the filling in the main part of the fridge (not the door) to keep it at a consistent temperature.
Freezing Cream Cheese Filling
Did you know you can freeze cream cheese filling? It’s a great way to extend its shelf life and have it ready for future recipes. Here’s how to do it right:
- Portion Before Freezing:
- Divide the filling into smaller portions using an ice cube tray, silicone molds, or small containers. This makes it easier to thaw only what you need.
- Pro Tip: Freeze individual portions on a baking sheet first, then transfer them to a freezer bag to prevent clumping.
- Use Freezer-Safe Containers:
- Store the filling in airtight, freezer-safe containers or heavy-duty freezer bags. Squeeze out as much air as possible to prevent freezer burn.
- Thawing Instructions:
- When you’re ready to use the filling, transfer it to the fridge and let it thaw overnight.
- Pro Tip: If the texture seems slightly grainy after thawing, give it a quick whip with a hand mixer to restore its smoothness.
- Freezer Shelf Life:
- Cream cheese filling can be frozen for up to 2 months without losing its flavor or quality.
Reviving and Refreshing Cream Cheese Filling
Sometimes, stored cream cheese filling might need a little TLC to bring it back to its original glory. Here’s how to refresh it:
- Whisk or Whip:
- If the filling has separated or become too thick, use a hand mixer or whisk to beat it until smooth and creamy.
- Pro Tip: Add a splash of milk or cream to loosen it up if needed.
- Adjust Consistency:
- For a thicker filling, let it sit in the fridge for 15-20 minutes. For a thinner consistency, mix in a small amount of liquid (like milk or heavy cream).
- Flavor Boost:
- If the flavor has dulled slightly after storage, add a pinch of salt, a squeeze of lemon juice, or a dash of vanilla extract to revive it.
Why Proper Storage Matters
- Maintains Freshness: Proper storage keeps your cream cheese filling tasting as good as the day you made it.
- Reduces Waste: By freezing or refrigerating correctly, you can avoid throwing away unused filling.
- Saves Time: Having pre-made filling on hand makes it easy to whip up desserts or snacks in a pinch.
Quick Storage Checklist
- Refrigerator: Store in an airtight container for up to 5 days.
- Freezer: Freeze in portions for up to 2 months.
- Thawing: Transfer to the fridge overnight and rewhip if needed.
What’s Next?
Now that you know how to store and preserve your cream cheese filling, you can make it ahead of time and have it ready for all your culinary adventures. Whether you’re baking for a crowd or treating yourself, these tips ensure your filling stays fresh, creamy, and delicious.
PrintPerfect Cream Cheese Filling

This creamy, dreamy cream cheese filling is a versatile staple for both sweet and savory dishes. Whether you’re baking desserts, stuffing pastries, or creating dips, this recipe is your go-to for a smooth, flavorful filling. Here’s everything you need to know to make it perfectly every time!
- Prep Time: 10 minutes
- Total Time: 10 minutes
- Yield: 12 (about 2 tablespoons per serving) 1x
- Category: Breakfast, Dessert, Snack
- Cuisine: American
Ingredients
- 8 oz full-fat cream cheese, softened
- 1 cup (120g) powdered sugar, sifted
- 1 tsp pure vanilla extract
- 2 tbps unsalted butter, softened (optional)
Instructions
- Prepare Ingredients: Ensure the cream cheese and butter (if using) are at room temperature. Sift the powdered sugar to remove lumps.
- Beat Cream Cheese: In a mixing bowl, beat the cream cheese on medium speed for 1-2 minutes until smooth and creamy.
- Add Sugar Gradually: With the mixer on low, slowly add the powdered sugar. Increase speed to medium and beat for 1-2 minutes until light and fluffy.
- Incorporate Vanilla and Butter: Add the vanilla extract and softened butter (if using). Beat until fully combined and smooth.
- Adjust Consistency: If the filling is too thick, add a splash of milk or cream. For a thicker consistency, chill in the fridge for 15-20 minutes.
- Use or Store: Use immediately in your favorite recipes, or store in an airtight container in the fridge for up to 5 days.
Notes
Tips for Success
-
Room Temperature Ingredients: Softened cream cheese and butter ensure a smooth, lump-free filling.
-
Customize Flavors: Add lemon zest, cocoa powder, or herbs for sweet or savory variations.
-
Storage: Freeze in portions for up to 2 months. Thaw in the fridge and rewhip before using.
Nutrition
- Calories: 120
FAQs
u003cstrongu003eWhat is in Philadelphia Cream Cheese Filling?u003c/strongu003e
Philadelphia cream cheese filling typically includes cream cheese, powdered sugar, and vanilla extract. Some recipes may also add butter for extra creaminess. It’s smooth, rich, and perfect for desserts like cheesecakes, pastries, and stuffed French toast.
u003cstrongu003eHow to Firm Up Cream Cheese Filling?u003c/strongu003e
To firm up cream cheese filling, chill it in the refrigerator for 15-20 minutes. For a thicker consistency, add a small amount of cornstarch or reduce the liquid ingredients. Avoid overmixing, as it can make the filling too soft.
u003cstrongu003eCan I Use Greek Yogurt Instead of Cream Cheese?u003c/strongu003e
Yes, you can use Greek yogurt as a lighter alternative to cream cheese. However, it will result in a tangier and less creamy texture. For best results, mix Greek yogurt with a thickener like cornstarch or blend it with a small amount of cream cheese.
u003cstrongu003eIs Mascarpone Cream Cheese?u003c/strongu003e
No, mascarpone is not cream cheese. While both are creamy and used in desserts, mascarpone is an Italian cheese made from cream, giving it a richer, buttery flavor. Cream cheese, on the other hand, has a tangier taste and firmer texture.
u003cstrongu003eWhat Thickens Cream Cheese?u003c/strongu003e
Cream cheese can be thickened by chilling it, adding powdered sugar, or incorporating a small amount of cornstarch. Avoid adding too much liquid, and ensure the cream cheese is at room temperature before mixing to maintain a smooth texture.
u003cstrongu003eHow to Thicken Cheesecake Filling?u003c/strongu003e
To thicken cheesecake filling, ensure your cream cheese is at room temperature and beat it until smooth. Add eggs one at a time, and avoid overmixing. If the filling is still too thin, chill it in the fridge or add a small amount of cornstarch or flour.
Conclusion
Cream cheese filling is more than just a recipe it’s a gateway to endless culinary creativity. Whether you’re baking a show-stopping dessert, whipping up a savory snack, or simply spreading it on your morning bagel, this versatile filling is sure to elevate every dish it touches. The best part? It’s incredibly easy to make and customize to suit your taste.
So, why not roll up your sleeves and start experimenting? Try adding your favorite flavors, pairing it with unexpected ingredients, or using it in a brand-new way. The possibilities are truly endless, and I can’t wait to see what you create!
If you have any questions, tips, or stories to share, drop a comment below. Let’s inspire each other and keep the cream cheese filling love alive. Happy cooking!


Leave a Reply