Introduction
There’s nothing quite like the creamy, chocolatey delight of a fudgesicle on a warm day. Whether you’re reminiscing about childhood summers or simply craving a refreshing dessert, this frozen treat never goes out of style. While store-bought fudgesicles are convenient, they often come with added sugars, artificial ingredients, and a hefty price tag. Why not skip the prepackaged options and whip up your own at home?
Making homemade fudgesicles is not only surprisingly simple but also incredibly rewarding. You get to control every ingredient, experiment with flavors, and cater to dietary preferences like vegan or low-sugar options. Plus, crafting these treats can be a fun family activity that ends with everyone enjoying a delicious creation straight from your freezer.
In this post, we’ll guide you step-by-step through an easy DIY fudgesicle recipe that promises creamy texture, rich chocolate flavor, and the satisfaction of knowing you made it yourself. Ready to indulge in the perfect homemade fudgesicle? Let’s dive in!
Why Make Your Own Fudgesicles?
Healthier Ingredients for a Guilt-Free Treat
One of the best things about making your own fudgesicles is the ability to choose healthier ingredients that fit your dietary needs and lifestyle. Store-bought versions are often loaded with artificial additives, preservatives, and excessive amounts of sugar, but when you create them at home, you have complete control over what goes into your frozen treats.
Start with a high-quality cocoa powder, preferably unsweetened and organic. Cocoa is not just the star ingredient for its rich chocolate flavor; it’s also packed with antioxidants that can benefit your overall health. If you want to enhance the creaminess without using heavy cream, opt for plant-based milks like almond, oat, or coconut milk. These options are perfect for those who are lactose intolerant, vegan, or simply looking to reduce their intake of dairy. For an extra boost of nutrients, you can even use fortified plant-based milks that contain added vitamins like calcium and B12.
When it comes to sweeteners, there’s no need to rely on refined sugar. Natural alternatives like honey, maple syrup, or agave nectar provide sweetness without spiking blood sugar levels as dramatically as traditional sugar. For a sugar-free option, stevia or monk fruit sweetener work well and keep the treats guilt-free for those watching their sugar intake.
You can also sneak in some nutritional upgrades, like adding a spoonful of chia seeds or a dollop of nut butter for added protein and fiber. These small tweaks can make your fudgesicles not just a dessert but a snack you can feel good about eating. By using wholesome, simple ingredients, you’ll enjoy a fudgesicle that’s as nutritious as it is delicious. It’s a win-win for your health and your taste buds!
Cost-Effective and Fun for the Family
Making your own fudgesicles at home isn’t just about enjoying a delicious treat it’s also a fantastic way to save money while creating memorable experiences with your family. Store-bought fudgesicles can be pricey, especially if you’re buying premium brands or specialty options like dairy-free or low-sugar varieties. By making them at home, you can significantly cut costs by using ingredients you likely already have in your pantry, like cocoa powder, milk, and a sweetener of your choice.
Beyond the financial savings, making fudgesicles is an engaging and enjoyable activity for the whole family. Kids love getting hands-on in the kitchen, and this recipe offers plenty of opportunities for them to help. Whether they’re measuring ingredients, stirring the mixture, or pouring it into molds, it’s a chance for them to feel involved and learn basic cooking skills in the process. The anticipation of waiting for the fudgesicles to freeze makes the final result even more rewarding!
You can also turn the process into a creative project. Let your family experiment with fun add-ins like crushed cookies, mini chocolate chips, or swirls of peanut butter. Younger children might enjoy decorating their finished fudgesicles with colorful sprinkles or dipping them in melted chocolate. Not only does this foster creativity, but it also allows everyone to personalize their treats exactly the way they like.
The best part? Homemade fudgesicles make for a healthier, wallet-friendly snack that brings the family together. Whether you’re whipping them up for a weekend treat or preparing a batch for a special occasion, the process and the end result will be as delightful as the time spent together creating them.
Control the Flavor and Texture
One of the greatest advantages of making your own fudgesicles is the ability to fully customize the flavor and texture to suit your preferences. Store-bought options often come in limited flavors and may have a uniform, overly processed texture. At home, you’re the chef, and you have the freedom to get creative with every detail of your fudgesicle recipe.
When it comes to flavor, the possibilities are endless. Start with the basics by selecting the right type of cocoa powder or chocolate. For a rich, dark chocolate taste, use unsweetened cocoa powder or melted dark chocolate. Prefer a milder, creamier taste? Opt for milk chocolate or sweetened cocoa powder. You can also enhance the flavor by adding a dash of vanilla extract, a pinch of cinnamon, or even a drop of peppermint or orange extract for a unique twist.
Texture is another aspect you can fine-tune to perfection. If you prefer a creamy, smooth fudgesicle, using full-fat dairy like whole milk or heavy cream will yield a rich and velvety result. For a lighter option, try almond or oat milk, which can still produce a silky texture without the extra calories. Want a bit of crunch? Stir in nuts, crushed cookies, or chocolate chips before freezing. Alternatively, for a fudge swirl effect, fold in caramel or peanut butter just before pouring the mixture into molds.
Another key factor in achieving the perfect texture is how you freeze the fudgesicles. Make sure the mixture is well-blended and poured smoothly into molds to avoid icy chunks. For added fun, layer different flavors in the mold for a multi-dimensional treat. By controlling these elements, you’ll create fudgesicles that cater to your exact tastes and texture preferences, ensuring every bite is a delight.
Ingredients and Tools Needed for Homemade Fudgesicles
Essential Ingredients for Creamy Fudgesicles
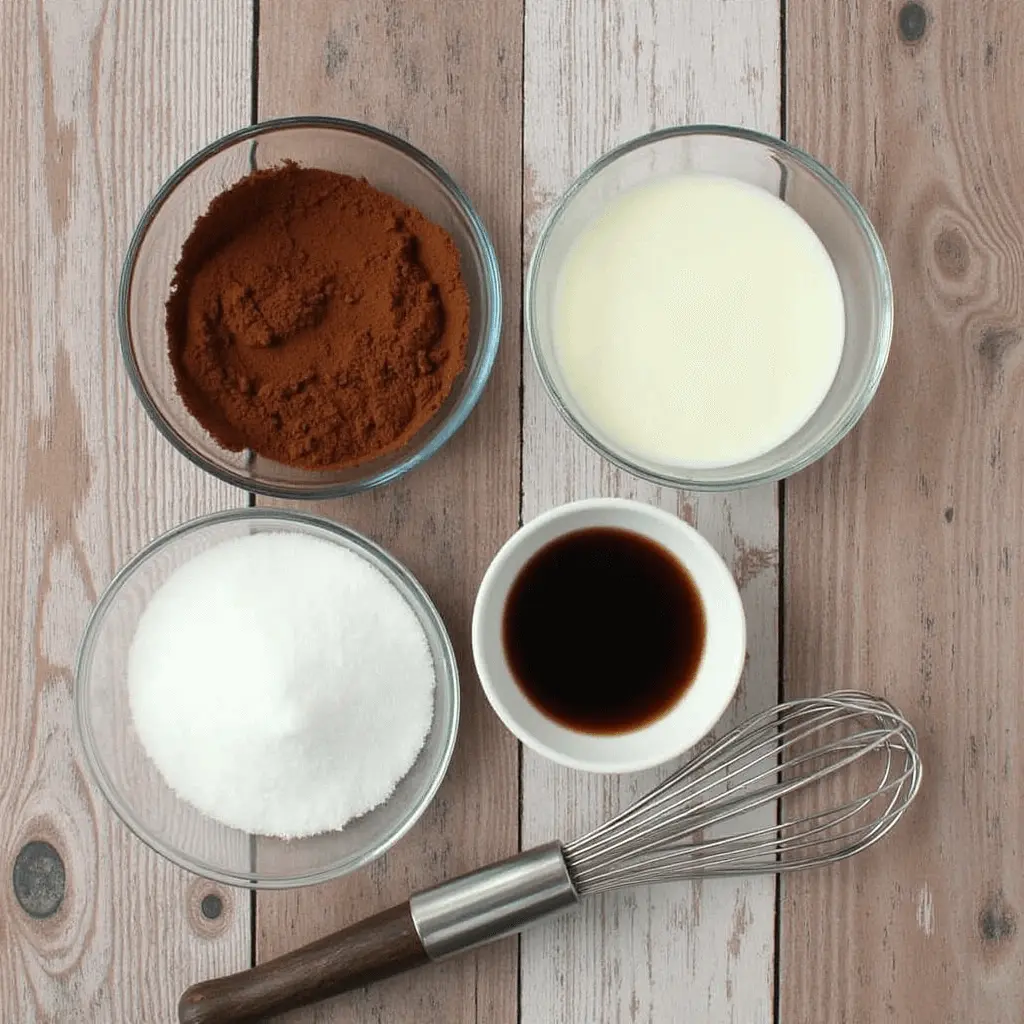
Creating the perfect creamy fudgesicle starts with selecting the right ingredients. Each component plays a crucial role in achieving the rich, velvety texture and indulgent flavor that make fudgesicles so irresistible. Here’s a breakdown of the essential ingredients that form the foundation of your homemade frozen treat:
1. Cocoa Powder or Chocolate:
The star of any fudgesicle recipe is the chocolate element. Unsweetened cocoa powder is a versatile choice that delivers a deep, chocolatey flavor. For an even richer experience, you can use melted dark or milk chocolate. Choose high-quality cocoa or chocolate to ensure an authentic and satisfying taste.
2. Milk or Cream:
The type of milk or cream you use will significantly impact the texture of your fudgesicles. Whole milk or heavy cream adds richness and creaminess, while plant-based alternatives like almond, coconut, or oat milk can create a lighter, dairy-free version. For a balanced texture, you can combine different types of milk, such as half dairy and half non-dairy.
3. Sweetener:
Sweeteners not only add the necessary sweetness but also influence the texture. Granulated sugar is a classic option, but natural alternatives like honey, maple syrup, or agave nectar can enhance the flavor while providing a softer consistency. For a low-calorie option, try using stevia or monk fruit sweetener.
4. Vanilla Extract and Flavor Enhancers:
A dash of vanilla extract elevates the overall flavor, adding a subtle warmth that complements the chocolate. You can also experiment with other extracts, like mint or almond, to create unique variations.
5. Optional Add-Ins:
Ingredients like a pinch of salt, a dollop of peanut butter, or even a splash of coffee can add depth and complexity to the flavor. These extras take your fudgesicles from ordinary to extraordinary.
With these ingredients, you’ll be well on your way to making creamy, flavorful fudgesicles that rival any store-bought version.
Tools to Perfect Your Fudgesicle Recipe
Creating the perfect fudgesicle requires more than just the right ingredients it also depends on having the proper tools to streamline the process and achieve consistent results. While the recipe itself is simple, investing in a few essential items can make your homemade fudgesicle experience smoother and more enjoyable. Here’s a look at the must-have tools:
1. Popsicle Molds:
Popsicle molds are the foundation of any great fudgesicle. Available in a variety of shapes and sizes, these molds help create the classic fudgesicle look while ensuring an even freeze. Silicone molds are particularly popular for their flexibility, making it easy to release the fudgesicles without breaking them. Look for molds that include reusable sticks or built-in handles to reduce waste.
2. Mixing Bowl and Whisk (or Blender):
To achieve a smooth, creamy fudgesicle base, you’ll need a mixing bowl and a good whisk to blend the ingredients thoroughly. If you’re looking for an ultra-smooth texture, a blender or hand mixer is even better. These tools ensure that ingredients like cocoa powder, milk, and sweeteners are evenly combined without clumps or separation.
3. Measuring Cups and Spoons:
Precision is key when it comes to balancing flavors and achieving the right consistency. Measuring cups and spoons help you accurately portion ingredients, ensuring each batch turns out perfectly.
4. Funnel or Ladle:
Pouring the fudgesicle mixture into molds can be tricky without spilling. A funnel or ladle makes this step much easier and keeps your workspace clean.
5. Freezer Space:
Though not a physical tool, ensuring you have ample flat freezer space is crucial. Placing your molds on a flat surface prevents uneven freezing and ensures your fudgesicles maintain their shape.
By equipping yourself with these tools, you’ll simplify the process of making fudgesicles and guarantee professional-quality results every time. Whether you’re a seasoned cook or a beginner, having the right equipment makes all the difference in perfecting this delightful frozen treat.
Step-by-Step Recipe for DIY Fudgesicles
Mixing the Perfect Fudgesicle Base
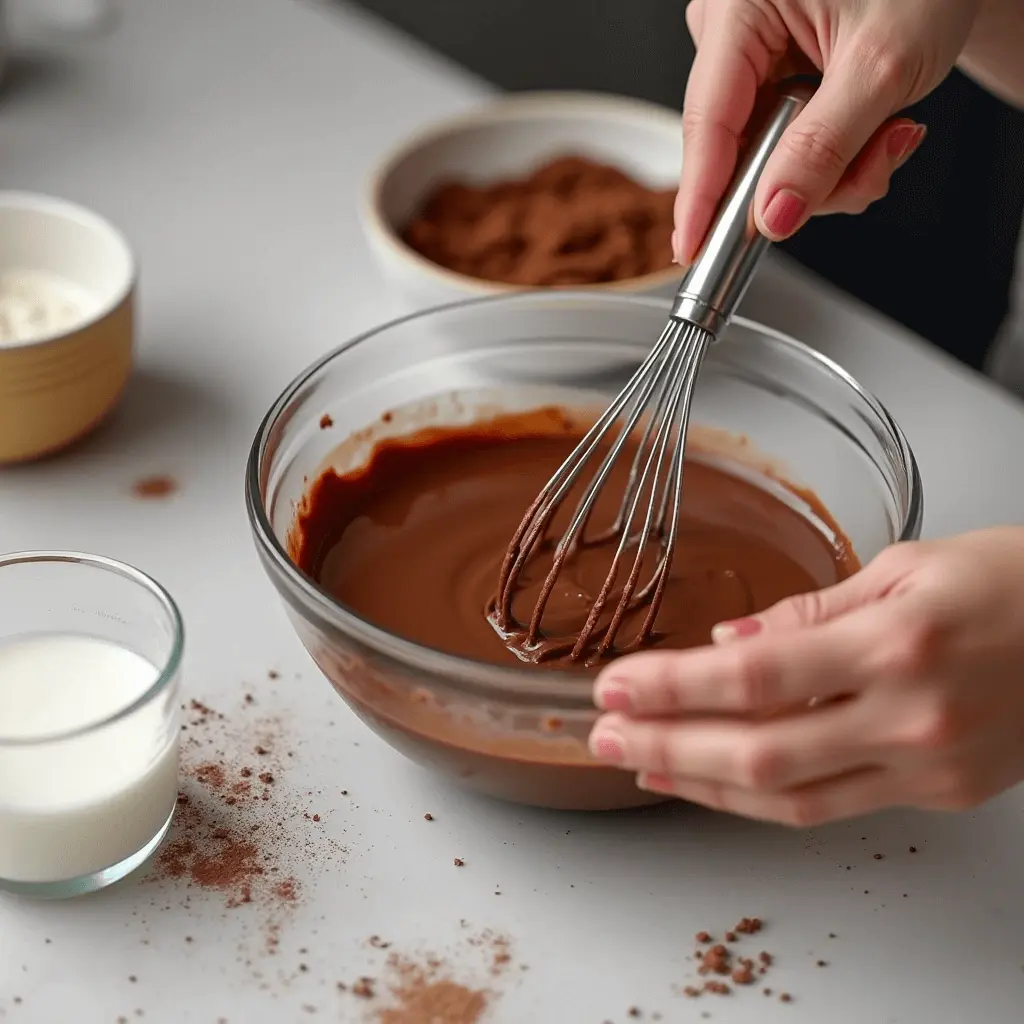
The foundation of any great fudgesicle lies in crafting a smooth, creamy base that delivers the perfect balance of flavor and texture. This step sets the stage for the frozen delight you’ll enjoy later, so taking the time to mix the base correctly is essential. Here’s how to create the ideal fudgesicle mixture:
1. Combine Your Dry Ingredients First:
Start by sifting your cocoa powder into a mixing bowl. Sifting prevents lumps and ensures the cocoa blends seamlessly into the liquid ingredients. If you’re using sugar as a sweetener, add it to the cocoa at this stage, allowing the two dry ingredients to combine evenly. This step is crucial for achieving a uniform flavor.
2. Gradually Add Your Liquid Ingredients:
Pour your milk or milk alternative into the bowl a little at a time, whisking continuously to prevent clumping. Whether you’re using whole milk, almond milk, or coconut milk, adding it slowly ensures the cocoa powder dissolves completely. If you’re aiming for a richer texture, you can substitute part of the milk with heavy cream or yogurt.
3. Incorporate Sweeteners and Flavorings:
Once the cocoa and milk are fully blended, add your chosen sweetener, such as honey, maple syrup, or sugar. Stir until the sweetener dissolves completely. At this stage, you can also add a splash of vanilla extract or other flavorings, like peppermint or almond extract, to elevate the flavor profile.
4. Blend for Extra Creaminess:
To achieve an ultra-smooth texture, transfer the mixture to a blender and blend on high for 30 seconds. This step aerates the mixture slightly, creating a silky base that freezes more evenly.
5. Taste and Adjust:
Before pouring the mixture into molds, taste it to ensure the balance of sweetness and chocolate is to your liking. Adjust as needed add a bit more cocoa for intensity or a touch more sweetener for balance.
A well-mixed fudgesicle base is the key to creating frozen treats that are smooth, creamy, and bursting with chocolatey goodness. Taking these extra steps ensures every bite of your fudgesicle is as delightful as you imagined.
Pouring and Freezing Tips for Perfect Results
The final steps in making your fudgesicles pouring the mixture into molds and freezing are just as important as mixing the base. Small adjustments and careful techniques can make a big difference in achieving fudgesicles that look and taste professionally made. Follow these tips to ensure your frozen treats come out perfect every time.
1. Choose the Right Molds and Prep Them Properly:
Start by selecting popsicle molds that suit your desired shape and size. Silicone molds are an excellent choice because they make it easier to remove the fudgesicles once frozen. Before pouring, ensure your molds are clean and dry. If you’re using molds with reusable sticks, position the sticks securely in the holders to prevent shifting during freezing.
2. Pour with Precision:
Use a funnel, ladle, or a measuring cup with a spout to pour the fudgesicle mixture into the molds. This minimizes spills and ensures an even fill. Leave about ¼ inch of space at the top of each mold to allow for expansion as the mixture freezes. Filling them too full can cause overflow, while underfilling may result in air gaps.
3. Tap Out Air Bubbles:
After pouring, gently tap the molds on the counter to release any trapped air bubbles. This step ensures a smoother texture and prevents unsightly holes in the finished fudgesicles.
4. Cover and Freeze Properly:
If your molds come with a lid, make sure it is securely in place. Place the molds on a flat surface in the freezer to ensure the fudgesicles freeze evenly. It’s best to position them in a section of the freezer with consistent temperatures and away from frequently opened doors.
5. Allow Ample Freezing Time:
Patience is key. Let your fudgesicles freeze for at least 4-6 hours, or preferably overnight, to ensure they are completely solid. Avoid opening the freezer repeatedly during this time, as it can disrupt the freezing process.
6. Easy Removal Tips:
When ready to serve, run the molds under warm water for 10-15 seconds to loosen the fudgesicles. Gently wiggle the sticks to release them without breaking.
By following these pouring and freezing tips, you’ll achieve fudgesicles that are not only delicious but also perfectly formed, making them a joy to share and savor.
Variations to Customize Your Fudgesicles
One of the best things about making fudgesicles at home is the freedom to get creative with flavors, textures, and add-ins. Whether you want a unique twist on the classic chocolate treat or need to cater to specific dietary preferences, customizing your fudgesicles ensures there’s something for everyone. Here are some delicious variations to inspire your next batch:
1. Flavor Enhancements:
Chocolate may be the star, but adding complementary flavors can take your fudgesicles to the next level. Try swirling in peanut butter or almond butter for a nutty kick, or mix in a few drops of peppermint extract for a refreshing twist. For a mocha-inspired treat, add a teaspoon of instant coffee or espresso powder to the base. Love fruity flavors? Incorporate pureed raspberries, strawberries, or bananas for a sweet and tangy contrast to the chocolate.
2. Texture Add-Ins:
Customize the texture of your fudgesicles by folding in crunchy or chewy ingredients. Mini chocolate chips, crushed cookies, or chopped nuts like almonds or hazelnuts add a delightful crunch. For a burst of sweetness, mix in marshmallows, caramel swirls, or toffee bits. If you prefer something healthier, sprinkle in chia seeds or shredded coconut for added fiber and texture.
3. Dietary Modifications:
Fudgesicles are incredibly versatile and can be adapted to suit various dietary needs. For a dairy-free or vegan option, use almond, coconut, or oat milk and sweeten with maple syrup or agave nectar. To make them sugar-free, opt for stevia or monk fruit sweetener. For a protein boost, add a scoop of chocolate protein powder to the mix.
4. Layering and Dipping:
Create eye-catching fudgesicles by layering different flavors. Pour a chocolate layer, freeze for 15 minutes, then add a vanilla or fruit layer. Repeat as desired for a striped effect. Once frozen, dip your fudgesicles in melted chocolate and roll them in sprinkles, nuts, or cookie crumbs for a gourmet finish.
With endless customization options, your fudgesicles can be as unique as your cravings. These variations not only make your treats more exciting but also allow you to cater to different tastes, turning a simple dessert into a creative culinary masterpiece. here
Creative Variations to Try
Dairy-Free and Vegan Fudgesicles
For those who are lactose-intolerant, vegan, or simply looking to reduce their dairy intake, dairy-free and vegan fudgesicles are the perfect solution. They’re just as creamy, chocolatey, and satisfying as their traditional counterparts, but made with plant-based ingredients that cater to a variety of dietary needs. Here’s how to craft delicious fudgesicles that everyone can enjoy.
1. Choosing the Right Milk Alternatives:
The foundation of a creamy vegan fudgesicle starts with the milk alternative. Almond milk, oat milk, and coconut milk are popular choices, each adding their unique flavor and texture. Coconut milk, particularly the full-fat variety, creates an ultra-rich and creamy base, while oat milk provides a neutral flavor and smooth consistency. Almond milk, on the other hand, is lighter and pairs well with the chocolatey flavor.
2. Sweeteners for Vegan Fudgesicles:
Instead of traditional sugar or honey, opt for plant-based sweeteners like maple syrup, agave nectar, or date syrup. These natural sweeteners not only add sweetness but also enhance the fudgesicle’s flavor profile with subtle notes of caramel or fruit. For a sugar-free option, use stevia or monk fruit sweetener.
3. Thickening and Enhancing Creaminess:
For an extra creamy texture, consider adding a spoonful of almond butter, cashew butter, or tahini to the mixture. These nut butters add a rich, velvety feel and boost the nutritional value with healthy fats. You can also use avocado for a smooth and decadent consistency that pairs beautifully with chocolate.
4. Flavor Variations and Add-Ins:
Get creative with your vegan fudgesicles by adding flavor extracts like vanilla, mint, or orange. Swirl in some peanut butter, fruit purees, or crushed nuts for added variety. For an indulgent twist, sprinkle vegan chocolate chips or drizzle melted dark chocolate over the finished treats.
5. Freezing Tips for Perfect Results:
Plant-based fudgesicles freeze just as well as traditional ones. Follow standard pouring and freezing tips, ensuring you tap out any air bubbles for a smooth, professional-looking finish.
With these simple substitutions and enhancements, you can create dairy-free and vegan fudgesicles that are every bit as delicious as the classic version. They’re the ideal guilt-free dessert for everyone, regardless of dietary restrictions!
Healthy Fudgesicles with Less Sugar
Fudgesicles don’t have to be overly sweet to be delicious. By reducing the sugar content and using healthier alternatives, you can create a treat that satisfies your chocolate cravings without the added guilt. Making low-sugar fudgesicles at home allows you to control the sweetness and incorporate nutrient-rich ingredients for a healthier dessert.
1. Natural Sweeteners for Balanced Flavor:
Instead of relying on refined sugar, try natural sweeteners like honey, maple syrup, or agave nectar. These options add a touch of sweetness while offering additional nutrients, such as antioxidants and minerals. If you’re aiming for a completely sugar-free recipe, stevia or monk fruit sweetener are excellent choices. Both are plant-based, calorie-free, and ideal for those watching their sugar intake or managing diabetes.
2. Boosting Natural Sweetness with Ingredients:
You can enhance the natural sweetness of your fudgesicles by incorporating ripe fruits like bananas or dates into the base. Mashed bananas add a creamy texture and mild sweetness, while blended dates provide a rich, caramel-like flavor. These fruits not only reduce the need for added sweeteners but also increase the fiber content, making your fudgesicles more filling and nutritious.
3. Using High-Quality Chocolate:
Opt for unsweetened cocoa powder or dark chocolate with a high cacao percentage (70% or more). Dark chocolate has a naturally rich flavor, reducing the need for excessive sweeteners. Pair it with vanilla extract or a pinch of sea salt to enhance the chocolatey taste.
4. Creamy Texture Without the Calories:
Instead of heavy cream, use almond milk, oat milk, or coconut milk for a lighter base. For extra creaminess, add a spoonful of Greek yogurt or unsweetened nut butter. These ingredients contribute to a satisfying texture while keeping the calorie count low.
5. Freeze and Indulge Guilt-Free:
Once your healthy fudgesicle mixture is ready, pour it into molds and freeze until solid. The result? A delicious, low-sugar treat that doesn’t compromise on flavor.
By swapping out refined sugars and incorporating nutrient-rich ingredients, you can enjoy fudgesicles that are as wholesome as they are indulgent a win for your taste buds and your health! here
Tips for Storing and Serving Fudgesicles
Best Practices for Long-Lasting Freshness
Homemade fudgesicles are a delicious treat, but ensuring they remain fresh and flavorful after freezing requires proper storage and handling. By following a few best practices, you can extend the life of your fudgesicles and enjoy them at their best long after they’ve been made.
1. Use Airtight Molds or Wrapping:
If you plan to store your fudgesicles for an extended period, airtight containers or molds with secure lids are essential. These prevent air exposure, which can lead to freezer burn and affect both the taste and texture of your fudgesicles. If your molds don’t have lids, you can individually wrap each fudgesicle in plastic wrap or aluminum foil once they’re fully frozen.
2. Store in a Freezer Bag or Container:
For added protection, place your wrapped fudgesicles in a freezer-safe bag or container. Be sure to remove as much air as possible from the bag before sealing it. This double-layer of protection helps maintain their flavor and texture by reducing exposure to moisture and odors from other frozen items.
3. Label and Date Your Fudgesicles:
Homemade treats can easily be forgotten in the freezer, so label your fudgesicle storage bag or container with the date they were made. While they can last for several weeks, consuming them within 2-3 weeks ensures the freshest taste and best texture.
4. Maintain Consistent Freezer Temperatures:
Temperature fluctuations can compromise the quality of your fudgesicles. Keep your freezer set to 0°F (-18°C) and avoid storing fudgesicles near the freezer door, where they are more exposed to temperature changes. Instead, place them in the back of the freezer for stable conditions.
5. Avoid Re-Freezing Partially Thawed Fudgesicles:
Once removed from the freezer, fudgesicles should be eaten promptly. Refreezing can create icy crystals and degrade their creamy texture.
By adopting these storage habits, you’ll ensure that every fudgesicle retains its rich, creamy, and chocolatey flavor for as long as possible. It’s the perfect way to savor your homemade efforts without sacrificing quality!
Presentation Ideas for Serving Fudgesicles
Fudgesicles are a treat not just for the taste buds but also for the eyes. Elevating their presentation can turn a simple dessert into a memorable experience, perfect for parties, family gatherings, or even just a fun afternoon snack. With a few creative touches, you can serve fudgesicles in ways that look as delightful as they taste.
1. Dress Them Up with Dips and Coatings:
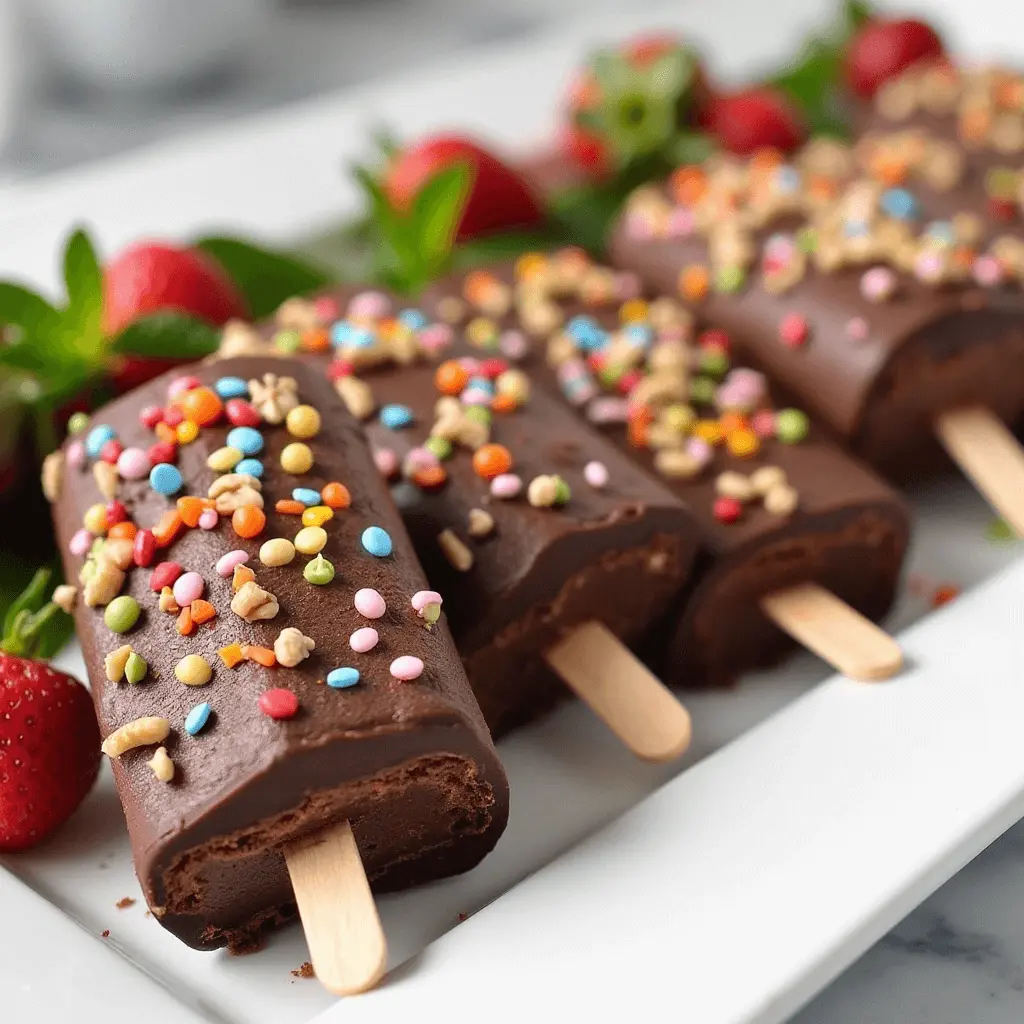
A quick dip in melted chocolate can transform your fudgesicles into a gourmet dessert. Use dark, milk, or white chocolate, and sprinkle toppings like crushed nuts, coconut flakes, or rainbow sprinkles while the coating is still wet. For a unique touch, drizzle them with caramel or peanut butter before serving. The contrast between the creamy fudgesicle and the crunchy toppings adds texture and visual appeal.
2. Add a Pop of Color:
Brighten up your fudgesicles with edible decorations. Edible glitter, freeze-dried fruit powder, or a dusting of cocoa or powdered sugar can add vibrant colors and textures. If serving to kids, consider using colorful popsicle sticks or wrapping the sticks with ribbons for a festive look.
3. Plate Them Creatively:
Serve your fudgesicles on chilled plates with complementary garnishes like fresh berries, mint leaves, or a dollop of whipped cream. For an elegant touch, arrange them on a platter with a drizzle of chocolate sauce or fruit coulis on the side for dipping.
4. Themed Servings for Special Occasions:
Customize your fudgesicles to match the occasion. For summer parties, serve them in bowls of crushed ice with tropical-themed decor. For holidays, use themed sprinkles or molds to shape your fudgesicles into stars, hearts, or other festive designs.
5. Pair with Other Treats:
Elevate your fudgesicles by pairing them with other desserts. Serve them alongside brownies, cookies, or slices of cake for a decadent dessert platter. For a refreshing option, pair them with a scoop of fruit sorbet or fresh fruit salad.
These presentation ideas make fudgesicles not just a delicious dessert but also a centerpiece for any event. With a little creativity, you can make your homemade fudgesicles as visually appealing as they are tasty! here
FAQs
What are fudgesicles made of?
Fudgesicles are typically made from a mixture of milk, cocoa powder, sugar, cornstarch, and vanilla extract. Some recipes also include heavy cream for a richer texture. Other ingredients like chocolate, honey, or Greek yogurt can be added for flavor variations.
Can a diabetic eat a fudgesicle?
I have type 1 diabetes and since your fudge bars are low in carbs, they do not affect my blood sugar. I’m so thankful there is something like this on the market for me to enjoy.
Are fudgesicles just chocolate ice cream?
Are fudgesicles chocolate ice cream? Not quite. While they do have similar ingredients (sugar, milk, cocoa, etc.), ice cream typically also includes heavy cream and pasteurized eggs.
Do fudgesicles have sugar in them?
Product Details. Fudgsicle No Sugar Added Fudge Pops – the original, delicious chocolate flavored fudge pops now have no sugar added! Each fudge pop frozen treat contains 40 calories, less than 1 g saturated fat, 45 mg of sodium, and 2.5 g of sugar.
How much caffeine is in a fudgesicle?
Do Fudgsicle® have caffeine? Each Fudgsicle fudge pop includes approximately . 19mg of caffeine. In comparison, a cup of coffee has roughly 45-180mg of caffeine, and a cup of tea has 24-31mg of caffeine
What happened to Blue Bell banana fudge bars?
Blue Bell Banana Fudge Bars were discontinued, but Blue Bell has released a new Banana Fudge ice cream flavor inspired by the nostalgic frozen treat, according to Southern Living. The new flavor features a swirl of Blue Bell Milk Chocolate and banana-flavored ice creams.
DIY Fudgesicle Recipe Creamy, Chocolatey, and Simple to Make
Creamy, chocolatey, and nostalgic these homemade fudgesicles are easy to make, totally customizable, and perfect for hot days or fun family moments.
- Prep Time: 10 minutes
- Cook Time: 0 minutes
- Total Time: 5 hours
- Yield: 8 popsicles
- Category: Dessert
- Method: Frozen
- Cuisine: American
Ingredients
1/2 cup unsweetened cocoa powder
2 cups milk or milk alternative (whole, almond, oat, or coconut)
1/2 cup sweetener (sugar, honey, maple syrup, or stevia)
1 tsp vanilla extract
Pinch of salt
Optional: nut butter, coffee, crushed cookies, chocolate chips
Instructions
1. In a mixing bowl, sift cocoa powder and mix with sweetener.
2. Gradually whisk in milk until smooth and lump-free.
3. Add vanilla extract, a pinch of salt, and any optional add-ins. Blend for extra creaminess if desired. Taste and adjust.
4. Pour mixture into popsicle molds, leaving a little space at the top. Tap molds gently to release air bubbles.
5. Insert sticks and freeze flat for 4–6 hours or overnight.
6. To serve, run molds under warm water for 10–15 seconds to loosen. Enjoy immediately!
Notes
Get creative with layers, dips, and toppings try adding nuts, rolling in sprinkles, or drizzling with melted chocolate.
Use silicone molds for easy release.
For a sugar-free version, use stevia or monk fruit sweetener.
Store in an airtight container or wrap individually in foil to prevent freezer burn.
Nutrition
- Serving Size: 1 fudgesicle
- Calories: 120
- Sugar: 10g
- Sodium: 40mg
- Fat: 5g
- Saturated Fat: 2g
- Unsaturated Fat: 3g
- Trans Fat: 0g
- Carbohydrates: 18g
- Fiber: 2g
- Protein: 2g
- Cholesterol: 0mg
Conclusion
Homemade fudgesicles are more than just a dessert they’re an opportunity to unleash creativity, cater to your personal tastes, and share joy with family and friends. From selecting the finest ingredients to experimenting with flavors, textures, and even dietary adaptations, each step in making fudgesicles at home allows you to craft a treat that’s uniquely yours. Whether you’re looking to keep things classic with creamy chocolate or explore exciting variations like dairy-free, low-sugar, or nutty swirls, the possibilities are endless.
Presentation adds another layer of delight, turning a simple frozen treat into a visual masterpiece. Whether dipped in chocolate, coated with sprinkles, or paired with fresh fruit, these serving ideas ensure your fudgesicles shine as both a snack and a statement. Proper storage techniques, too, mean you can enjoy your creations over time without compromising their flavor or texture.
Above all, homemade fudgesicles embody the perfect balance of indulgence and control you decide the ingredients, flavors, and health benefits. They’re a testament to how simple, budget-friendly recipes can deliver gourmet results.
So, grab your molds, mix up a batch, and freeze your way to deliciousness. Whether it’s a quiet treat on a sunny afternoon or a star dessert at your next party, your homemade fudgesicles are guaranteed to be a hit. Share your creations, experiment boldly, and enjoy every chocolatey bite!




Leave a Reply