Introduction
A Barbie birthday cake isn’t just a dessert it’s the centerpiece of a magical celebration that brings dreams to life. Perfect for young Barbie fans, this cake captures the essence of creativity and elegance, making it a memorable addition to any party. Whether you’re a baking enthusiast or a beginner, creating a stunning Barbie cake at home is easier than you think.
With a little planning, the right tools, and a sprinkle of imagination, you can craft a cake that dazzles your guests and delights the birthday girl. In this guide, we’ll walk you through the entire process, from choosing the ingredients to decorating like a pro, so you can create a show-stopping masterpiece that will be the talk of the party. Let’s turn your cake dreams into reality!
What You’ll Need to Make a Barbie Birthday Cake
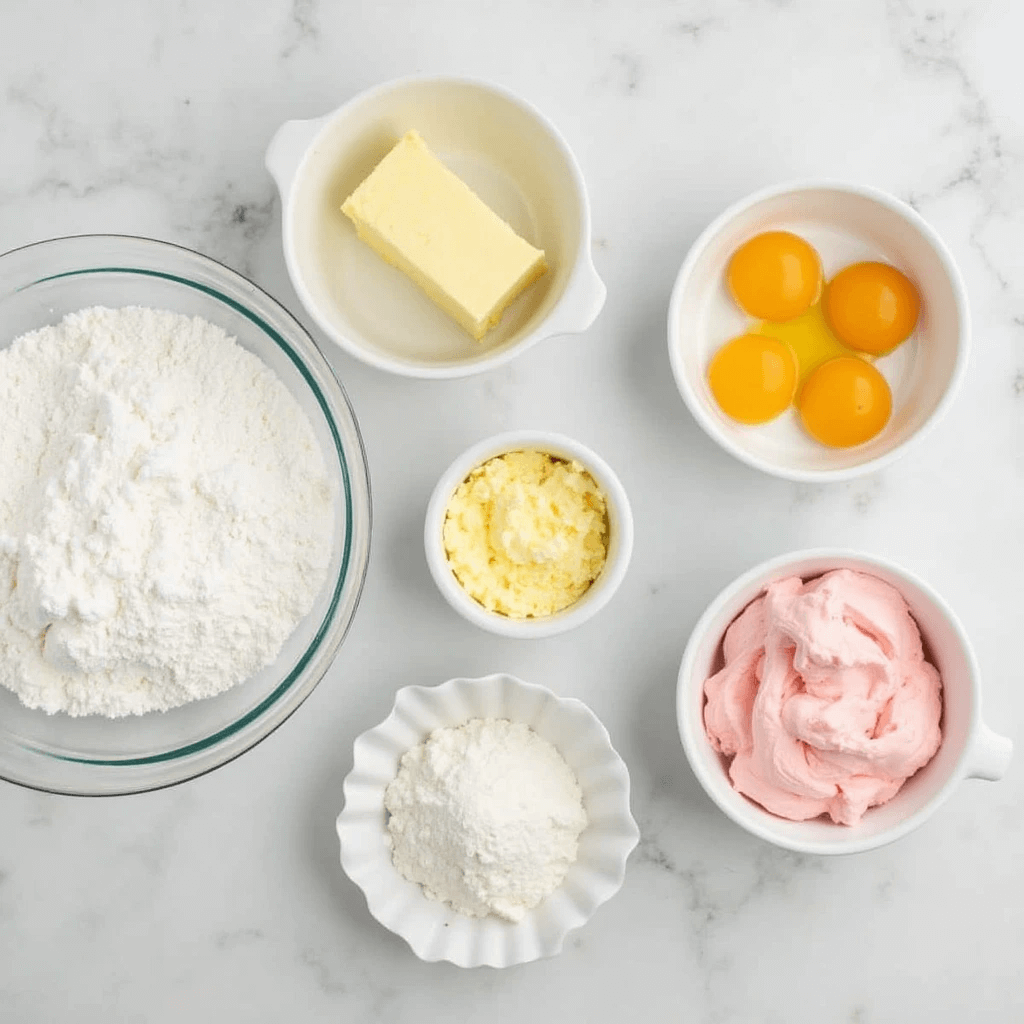
Ingredients: What You Need to Make a Barbie Birthday Cake
The ingredients you choose are the foundation of your Barbie birthday cake, so it’s essential to get them right. Here’s a breakdown of everything you’ll need to make a stunning and delicious cake that both looks and tastes amazing.
1. Cake Base
Start with a reliable cake base that holds its shape well and tastes delicious. A vanilla sponge cake is a popular choice for its light texture and versatility, but you can opt for chocolate, red velvet, or even funfetti to match your party’s theme. If you’re short on time, pre-baked cake layers or a store-bought cake mix can save you effort while still delivering great results.
2. Frosting Options
Frosting is key for assembling and decorating your cake. Buttercream frosting is ideal because it’s easy to work with and provides a smooth finish. You can make classic vanilla buttercream or customize it with food coloring to match Barbie’s signature pink palette. For a more polished look, consider using ganache or a combination of buttercream and fondant.
3. Fondant and Edible Decorations
To achieve Barbie’s iconic dress design, you’ll need fondant in shades of pink, white, or your chosen theme colors. Fondant is perfect for creating smooth surfaces, ruffles, and intricate designs. Stock up on edible glitter, pearls, and cake toppers to elevate the visual appeal.
4. Additional Ingredients
Don’t forget essentials like eggs, butter, sugar, and flour for homemade cakes. If you’re adding layers, use jam, fruit compote, or frosting as fillings to add flavor and moisture. You might also want vanilla extract or other flavorings for an extra touch of deliciousness.
Having these ingredients ready will set the stage for crafting a beautiful Barbie birthday cake that’s as delightful to eat as it is to look at!
Tools: Essential Equipment for Crafting a Barbie Birthday Cake
Having the right tools is crucial to creating a stunning Barbie birthday cake. These tools not only simplify the process but also ensure your cake turns out as professional and beautiful as you envision. Here’s a detailed guide to the essential tools you’ll need:
1. Cake Mold or Doll Cake Pan
The shape of Barbie’s dress is the star of the cake, and for that, a doll cake pan is indispensable. These pans are specially designed to create a dome shape that mimics a flowing skirt. If you don’t have a doll cake pan, you can stack regular round cake layers and carve them into the desired shape using a serrated knife.
2. Barbie Doll or Cake Topper
A classic Barbie doll will serve as the centerpiece of the cake. Make sure to wrap the lower half of the doll in plastic wrap or foil to keep it food-safe. You can also purchase a specialized doll cake topper, which often includes just the torso and head, making it easier to insert into the cake.
3. Frosting and Fondant Tools
To achieve a smooth and flawless finish, you’ll need tools like a frosting spatula for spreading buttercream evenly and a bench scraper for smoothing the sides. For fondant work, a rolling pin, fondant smoother, and small cutters are essential for creating decorations like ruffles, flowers, or bows.
4. Piping Bags and Tips
For intricate details, invest in piping bags and a variety of decorating tips. These tools allow you to add elegant buttercream designs, such as lace patterns, rosettes, or borders, that enhance the overall look of the cake.
5. Additional Tools
Other helpful tools include a cake turntable for effortless decorating, cake dowels for added stability in layered cakes, and a cake stand for displaying your masterpiece.
By assembling these tools beforehand, you’ll set yourself up for a smooth and enjoyable cake-decorating experience, ensuring your Barbie birthday cake is a show-stopping centerpiece at the party!
Optional Add-Ons: Elevate Your Barbie Birthday Cake
While the basic ingredients and tools are enough to create a beautiful Barbie birthday cake, adding optional elements can take your cake from stunning to unforgettable. These add-ons allow you to personalize the cake and make it a true showstopper.
1. Cake Stand for Presentation
A gorgeous cake deserves an equally beautiful display. Consider using a decorative cake stand that complements the theme of your Barbie cake. Look for options in pink, gold, or glittery finishes to enhance the overall presentation. A cake stand with multiple tiers can also be used if you’re showcasing cupcakes or additional desserts alongside the main cake.
2. Cake Dowels for Stability
If your cake includes multiple layers, cake dowels are a practical yet often overlooked tool. They provide structural support, ensuring the cake doesn’t shift or collapse. This is especially helpful if you’re transporting the cake to a party venue.
3. Pre-Made Cake Toppers
While a Barbie doll serves as the centerpiece, additional pre-made cake toppers can add an extra layer of charm. Consider items like edible tiaras, miniature high heels, or sparkling “Happy Birthday” signs to accentuate the Barbie theme. You can also find Barbie-themed toppers that match the specific style or design of the cake.
4. LED Lights or Sparkling Elements
For an extra wow factor, add LED lights around the base of the cake or incorporate edible glitter and shimmering powders into the design. These elements make the cake sparkle and stand out, especially in dim lighting.
5. Themed Decorations Around the Cake
Create a scene around the cake by adding Barbie-themed props, such as miniature furniture, accessories, or edible flowers. This turns your cake into a complete centerpiece that ties together the party décor.
By incorporating these optional add-ons, you’ll add a layer of uniqueness and sophistication to your Barbie birthday cake, leaving a lasting impression on everyone at the party!
Step-by-Step Guide to Assembling Your Barbie Birthday Cake
Baking the Cake: The Foundation of Your Barbie Birthday Cake
The first step in creating a stunning Barbie birthday cake is to bake a sturdy yet moist base that can support the design and decorations. A well-baked cake provides the perfect canvas for your masterpiece, so let’s go over the process step by step.
1. Choosing the Right Recipe
Selecting the right cake recipe is crucial. A vanilla sponge cake is a popular choice for its light texture and neutral flavor, but you can also opt for chocolate, red velvet, or funfetti cake for variety. Whatever flavor you choose, ensure the recipe yields a cake that is firm enough to hold its shape when stacked and carved.
2. Preparing the Batter
Begin by gathering all your ingredients and preheating the oven to the temperature specified in your recipe. Grease and flour your cake pan or use parchment paper to ensure easy removal. Mix the batter according to the recipe, making sure to beat until smooth and airy. For a dome-shaped Barbie dress, consider using a doll cake pan or a deep oven-safe bowl.
3. Baking the Cake
Pour the batter evenly into your prepared pan, filling it about two-thirds full to allow room for the cake to rise. Bake according to the recipe, typically for 30-40 minutes, or until a toothpick inserted in the center comes out clean. Avoid opening the oven too frequently to prevent uneven baking.
4. Cooling the Cake
Once baked, allow the cake to cool in the pan for 10-15 minutes before transferring it to a wire rack. Let it cool completely to room temperature before moving on to stacking or carving. A warm cake can crumble or cause frosting to melt, so patience is key.
By following these steps, you’ll have a perfectly baked cake that’s ready to be transformed into a stunning Barbie birthday centerpiece!
Preparing the Barbie Doll: The Star of the Cake
The Barbie doll is the centerpiece of your cake, and preparing it properly ensures it blends seamlessly with the design while remaining food-safe. With a few simple steps, you can turn a regular Barbie into a stunning cake topper that creates the illusion of a beautiful doll wearing an edible dress.
1. Selecting the Right Doll
Choose a Barbie doll that fits the theme of your party. You can use a standard Barbie or a Barbie-themed doll, such as a princess or ballerina, to match the aesthetic. If the doll is new, remove it from the packaging and clean it thoroughly with warm water and mild soap to ensure it’s ready for use.
2. Protecting the Doll
To make the doll food-safe, wrap the lower half of its body (from the waist down) in plastic wrap or aluminum foil. This protects the doll from direct contact with the cake and frosting, ensuring hygiene while preventing any damage to the doll. If the doll’s clothing is removable, take it off to avoid any mess. You can later dress the upper half with fondant or frosting to match the cake design.
3. Adjusting the Doll for the Cake
If the doll is too tall for the cake, you may need to adjust its size. You can do this by gently removing its legs (they’re designed to pop out easily) or by carving the cake taller to accommodate the full doll. Test the fit by inserting the doll into the center of the cake and ensuring it sits securely without tipping over.
4. Styling the Doll for the Cake
Before placing the doll into the cake, style its hair and decorate the upper body to complement the cake’s theme. You can braid the hair, tie it up, or add edible accessories like a fondant tiara. The upper half of the doll can be dressed using fondant, buttercream, or other edible decorations to create a cohesive look.
By preparing the Barbie doll with care, you ensure it becomes the perfect focal point for your cake, bringing the entire design together in a way that wows your guests!
Assembling the Cake Layers: Building the Foundation for Barbie’s Dress
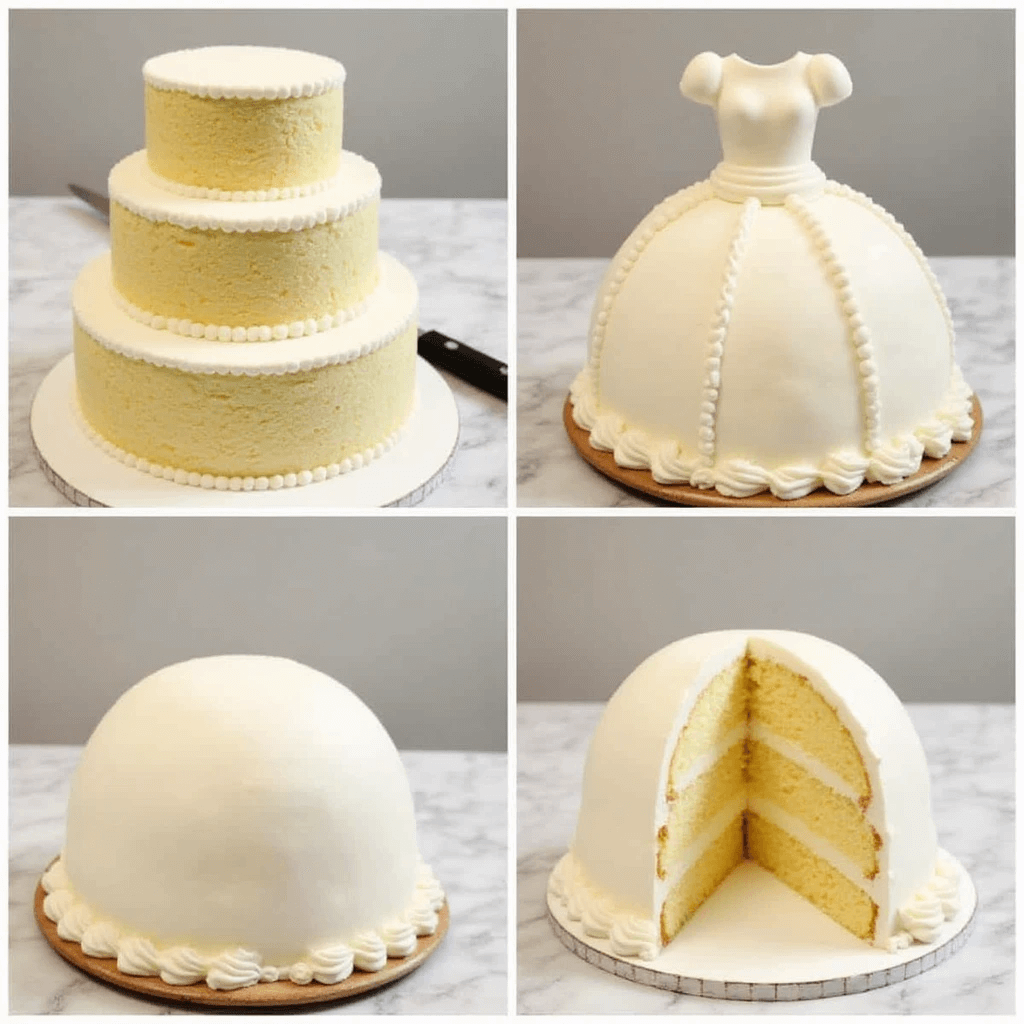
Assembling the cake layers is a crucial step in creating the stunning Barbie birthday cake. This process transforms individual cake layers into the iconic dress shape, setting the stage for decoration. Here’s how to do it step by step:
1. Preparing the Layers
Once your cake layers have cooled completely, it’s time to prepare them for assembly. If you’ve baked your cake in a dome-shaped pan, you can skip carving. For standard round layers, use a serrated knife to trim the tops and create an even, flat surface. This ensures stability and a clean finish when stacking.
If the layers are different sizes, stack them largest to smallest to naturally create the dress’s skirt shape. For added height, bake additional layers or use a deep bowl-shaped cake for the base.
2. Adding the Filling
Place the largest cake layer on a sturdy cake board or stand. Spread an even layer of frosting, ganache, or filling (such as jam or buttercream) over the top using a frosting spatula. Repeat this process as you stack each layer. The filling not only adds flavor but also helps hold the layers together.
3. Carving the Skirt Shape
After stacking, use a serrated knife to carve the cake into a gradual dome shape that resembles a dress. Take your time to avoid over-carving, and save any cake scraps for later use, such as creating cake pops. Check for symmetry and smoothness as you work.
4. Ensuring Stability
Insert cake dowels or sturdy straws into the cake for support, especially if you’re stacking many layers. This prevents the cake from shifting or collapsing. Trim the dowels so they’re flush with the cake surface.
5. Preparing for Decoration
Once the layers are assembled and stable, apply a crumb coat of frosting to seal in crumbs. Chill the cake for about 20-30 minutes to set the crumb coat before applying the final layer of frosting or fondant.
With a well-assembled cake base, you’re ready to insert the Barbie doll and bring your design to life! Proper assembly ensures your Barbie birthday cake is as visually stunning as it is structurally sound.
Creative Decorating Ideas for Your Barbie Cake
Using Fondant for a Stunning Finish: Crafting Barbie’s Dream Dress
Fondant is a game-changer when it comes to creating a polished and professional look for your Barbie birthday cake. It provides a smooth, seamless finish and opens up endless possibilities for intricate designs and vibrant colors. Here’s how to use fondant to give Barbie’s dress a truly stunning finish.
1. Preparing the Fondant
Start by kneading the fondant to soften it and make it pliable. Dust your work surface and rolling pin with a bit of powdered sugar or cornstarch to prevent sticking. Roll out the fondant into a large, even sheet, about 1/8 inch thick, ensuring it’s big enough to cover the entire cake. If you’re going for a multi-colored or layered look, prepare different fondant colors separately.
2. Covering the Cake
Carefully lift the rolled-out fondant using your rolling pin or your hands and drape it over the cake. Starting at the top, gently smooth the fondant down the sides using a fondant smoother or your hands, working out any air bubbles or wrinkles. Trim away the excess fondant at the base using a sharp knife or pizza cutter for a clean edge.
3. Creating Dress Details
Fondant is perfect for crafting decorative elements like ruffles, bows, flowers, or lace patterns. Use fondant cutters or shape the details by hand. Layer fondant pieces to add depth and texture, and adhere them to the base layer with a small amount of water or edible glue.
4. Adding the Wow Factor
Enhance the fondant finish with edible glitter, shimmer powders, or food-safe markers to add sparkle and intricate designs. For a Barbie-themed touch, consider adding a fondant sash, belt, or tiara to match the doll’s upper body.
5. Final Touches
Once the fondant is in place, insert the Barbie doll into the center of the cake, ensuring her outfit seamlessly blends with the fondant dress. Touch up any details and ensure everything is secure.
By using fondant, you can create a flawless finish that not only looks professional but also elevates the overall aesthetic of the cake, making it the star of any Barbie-themed celebration.
Adding Edible Decorations: Bringing Barbie’s Dress to Life
Edible decorations are the perfect way to add personality, detail, and sparkle to your Barbie birthday cake. They not only enhance the visual appeal but also make the cake feel special and custom-made. Here’s how you can use edible decorations to transform your Barbie cake into a stunning masterpiece.
1. Edible Glitter and Shimmer Powders
Barbie is all about glamour, and edible glitter and shimmer powders are the ideal tools to give the cake a sparkling finish. Dust these over the fondant or frosting to create a magical, glistening effect. Choose shades like pink, gold, or silver to match the theme. You can even add shimmer to specific areas, like ruffles or bows, to make them stand out.
2. Edible Pearls and Beads
Add a touch of elegance to the dress with edible pearls or beads. These can be placed along the edges of the cake, on fondant ruffles, or scattered across the surface to mimic jewels. Use edible glue or a small dab of water to secure them in place.
3. Fondant Flowers and Bows
Create delicate fondant flowers or bows to decorate the skirt of Barbie’s dress. Use fondant molds or cutters for a uniform look, or shape them by hand for a more artistic effect. Layer the flowers in clusters or create cascading patterns for a dramatic design.
4. Piped Buttercream Designs
If you prefer working with buttercream, use piping bags and decorative tips to add lace patterns, rosettes, or swirls. Buttercream details can complement the fondant elements or serve as standalone decorations for added texture.
5. Themed Toppers and Accessories
Incorporate edible toppers like miniature tiaras, necklaces, or Barbie logos to enhance the theme. These can be made from fondant, chocolate, or isomalt for a sophisticated finish.
6. Custom Messages
Write a personalized birthday message using food-safe markers or pipe it with royal icing or buttercream. Place the message on a fondant banner or directly on the cake base for a heartfelt touch.
By combining these edible decorations, you can elevate your Barbie birthday cake to a work of art that captures the imagination and makes the celebration unforgettable!
Piping Buttercream Details: Adding Elegance and Texture
Piping buttercream details is where creativity truly shines in decorating your Barbie birthday cake. Buttercream is versatile, easy to work with, and can be used to create intricate patterns and stunning textures that add depth and elegance to the design. Here’s how you can master the art of buttercream piping:
1. Preparing the Buttercream
Start with a smooth, stiff-consistency buttercream that holds its shape well when piped. If it’s too soft, refrigerate it briefly; if it’s too stiff, add a tiny bit of milk or cream to achieve the right consistency. Divide the buttercream into separate bowls and add food coloring to match the theme think pinks, purples, or whites for Barbie’s signature look.
2. Choosing Piping Tips
Select piping tips that suit the details you want to create. For example:
- Round tips for dots, pearls, or writing.
- Star tips for rosettes, swirls, or ruffled edges.
- Petal tips for creating flowers or lace-like patterns.
Experiment with different tips on parchment paper to practice before piping directly onto the cake.
3. Piping Techniques
Use a piping bag fitted with your chosen tip to add decorations to the cake. Start with basic designs, such as borders along the cake’s base or accents on the fondant dress. Add rosettes, swirls, or tiny flowers to mimic the flowing details of Barbie’s gown. For an extra touch of elegance, pipe lace patterns or cascading vines on the skirt.
4. Adding Dimension and Texture
Layer your piping to create depth. For instance, you can pipe overlapping swirls or add smaller details on top of larger ones for a 3D effect. Use contrasting colors for extra visual interest.
5. Final Touches
Once the buttercream details are piped, sprinkle edible glitter or pearls over the design to make it sparkle. Refrigerate the cake briefly to set the buttercream and ensure it stays intact.
By mastering buttercream piping, you can add intricate details that elevate your Barbie birthday cake into a show-stopping centerpiece, perfect for any celebration! here
Tips for Hosting a Barbie-Themed Birthday Party
Can I Make a Barbie Birthday Cake Without Fondant?
Yes, you can absolutely make a stunning Barbie birthday cake without using fondant! While fondant is known for its smooth finish and ability to create intricate designs, buttercream and other decorating techniques can provide a beautiful and creative alternative. Here’s how to create a fabulous Barbie cake without fondant:
1. Use Buttercream for the Dress Base
Buttercream frosting is an excellent substitute for fondant when coating the cake. To achieve a smooth and polished look, use a frosting spatula and a bench scraper to even out the buttercream after applying a generous layer. For a slightly textured effect, use the back of a spoon or a comb frosting tool to add patterns to the skirt. Buttercream is easy to color, so you can mix shades of pink, white, or purple to mimic Barbie’s iconic style.
2. Piping Buttercream Details
Buttercream piping allows you to add intricate details to the cake, such as lace patterns, rosettes, or cascading ruffles that resemble Barbie’s flowing dress. Using a variety of piping tips (like star tips for rosettes or petal tips for ruffles), you can create an elegant design. Piping also lets you add borders, flowers, or even a draped fabric effect to the cake.
3. Incorporate Edible Decorations
To enhance the look, use edible decorations such as pearls, edible glitter, or sugar flowers. These can be added directly onto the buttercream to give the cake a glamorous finish. Chocolate shards or candy embellishments can also serve as accents for the dress.
4. Leverage Creative Alternatives
Instead of fondant, consider using modeling chocolate or marzipan for small, edible decorations like bows or accessories. These materials are easier to work with than fondant and blend seamlessly with buttercream designs.
5. Focus on the Barbie Doll
Since the doll is the centerpiece, style its upper body and hair creatively to draw attention. You can use buttercream to create a top for the doll or add edible glitter for sparkle. Surround the doll with piped details to integrate it smoothly into the cake.
Making a Barbie birthday cake without fondant not only saves time but also creates a softer, creamier texture that many people prefer. With buttercream and creative decoration techniques, you can achieve a beautiful and delicious cake that’s every bit as magical! here
How Do I Ensure My Cake is Stable?
Stability is crucial when assembling a Barbie birthday cake, especially since the design often involves multiple layers and a Barbie doll centerpiece. A stable cake prevents collapsing, sliding, or leaning, ensuring your creation looks perfect throughout the celebration. Here are practical tips to ensure your cake stays secure and steady:
1. Level Your Cake Layers
Uneven layers can cause instability, so it’s important to level each cake layer before stacking. Use a serrated knife or cake leveler to trim the tops of your cakes, creating flat, even surfaces. Flat layers stack more securely and distribute weight evenly, preventing the cake from tilting.
2. Use a Sturdy Cake Base
The foundation of your cake should be a strong cake board or plate that can support the weight of the entire cake. Avoid flimsy boards or plates, as they can bend or crack under pressure. If your cake is particularly tall or heavy, consider using a thick or double-layered board.
3. Add Support with Cake Dowels
For taller cakes, insert cake dowels or sturdy straws into the layers for added structural support. Dowels act as pillars that bear the weight of the layers above, preventing the lower layers from collapsing. Insert the dowels evenly around the cake’s center, trim them flush with the surface, and stack the layers carefully.
4. Apply a Crumb Coat
A crumb coat a thin layer of frosting applied to seal in crumbs helps hold the cake together and creates a smooth base for the final frosting layer. Refrigerate the cake after applying the crumb coat to firm it up and enhance stability.
5. Chill Between Steps
Refrigerating the cake at various stages of assembly, such as after stacking or before decorating, allows the frosting to set and the layers to firm up. A chilled cake is less likely to shift or slide during the decoration process.
6. Anchor the Barbie Doll
To securely position the Barbie doll in the cake, make a small hole in the top layer to insert the doll’s legs. Wrap the doll’s legs in plastic wrap to keep them food-safe. If needed, use a dowel or skewer alongside the doll for extra support.
7. Transport Carefully
If you need to transport the cake, use a sturdy cake carrier or box to protect it. Keep the cake on a flat surface during transit, such as the floor of your car, to minimize movement.
By following these tips, you can ensure your Barbie birthday cake remains stable, looks flawless, and is ready to impress your guests from the first slice to the last!
Can I Use a Different Doll Instead of Barbie?
Yes, you can absolutely use a different doll instead of Barbie to create a personalized cake that matches your party theme or the recipient’s favorite character! While Barbie is a classic choice for doll cakes, substituting her with another doll opens up endless creative possibilities. Here’s how you can adapt your cake to feature a different doll:
1. Choosing the Right Doll
Select a doll that suits the theme of the celebration. Options might include Disney princesses, action figures, or character dolls like Elsa, Moana, or even superhero figures. The size of the doll matters make sure it fits proportionally with your cake. Most standard dolls work well, but mini or larger dolls can be used with some adjustments to the cake’s height.
2. Preparing the Doll
The process of preparing the doll remains the same, regardless of which one you choose. Clean the doll thoroughly with mild soap and water, and wrap its lower half in plastic wrap or aluminum foil to make it food-safe. If the doll’s clothing is removable, take it off to prevent it from getting stained or damaged. For themed dolls, use edible decorations to mimic their signature outfits and details.
3. Adjusting the Cake Design
The cake’s decoration should align with the doll’s character. For example:
- A princess doll might need a fondant or buttercream gown styled like a ball gown.
- A superhero doll could feature bold colors and capes incorporated into the frosting design.
- A whimsical character might have a playful, colorful dress design with edible embellishments like candy or sprinkles.
4. Modifying the Cake Height
If the chosen doll is taller or shorter than Barbie, adjust the cake height by adding or removing layers. You can also trim the doll’s legs or use a smaller figurine if necessary. Test the fit by inserting the doll into the top of the cake before final assembly.
5. Personalizing for the Theme
Incorporate decorations and colors that reflect the doll’s personality or story. For example, use edible glitter and snowflakes for Elsa, tropical flowers for Moana, or a starry theme for a superhero doll. The goal is to seamlessly integrate the doll into the cake’s design so it becomes the centerpiece of your creation.
By using a different doll, you can tailor the cake to fit the preferences of the birthday child or match a unique party theme. This flexibility makes doll cakes a versatile and creative option for any celebration!
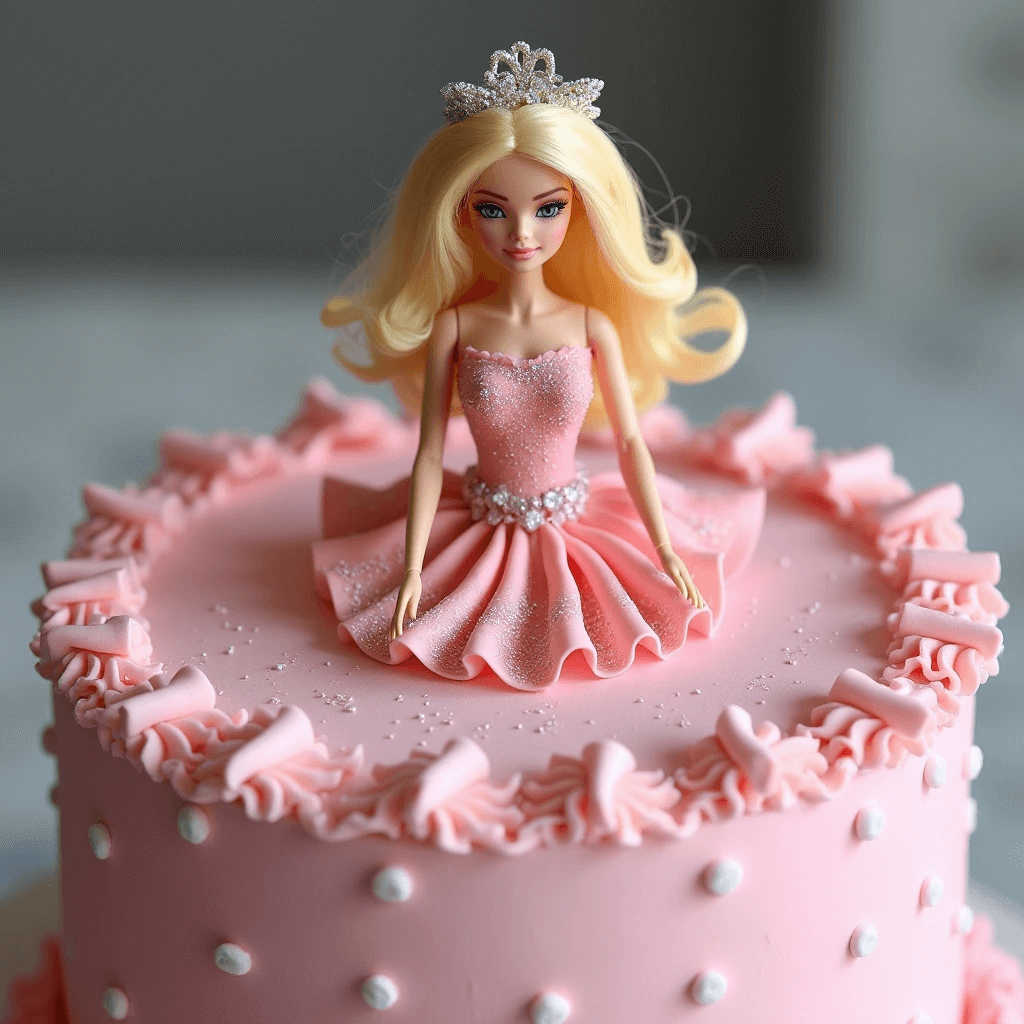
Stunning Barbie Birthday Cake
Equipment
- Cake Mold or Doll Cake Pan
- Mixing Bowls
- Electric Mixer
- Serrated Knife
- Cake Board
- Fondant Rolling Pin
- Piping bags and tips
- Cake turntable
Ingredients
Cake Base
- 3 cups all-purpose flour
- 2 cups granulated sugar
- 1 tbsp baking powder
- 1 tsp salt
- 1 cup unsalted butter softened
- 1 1/4 cups milk room temperature
- 4 large eggs
- 1 tbsp vanilla extract
Buttercream Frosting
- 1 cup unsalted butter softened
- 4 cups powdered sugar sifted
- 3 tbsp milk
- 1 tsp vanilla extract
Decorations
- 1 Barbie doll wrapped in plastic wrap
- fondant pink, white, or desired colors
- edible pearls, glitter, or decorations
Instructions
- Preheat oven to 350°F (175°C). Grease and flour a doll cake pan or 3 round cake pans.
- In a mixing bowl, whisk together flour, baking powder, and salt. Set aside.
- In another bowl, cream butter and sugar until light and fluffy. Add eggs one at a time, beating well after each addition. Stir in vanilla.
- Gradually mix in dry ingredients, alternating with milk, until combined.
- Pour batter into prepared pan(s) and bake for 35-40 minutes, or until a toothpick inserted comes out clean. Cool completely.
- Wrap Barbie doll in plastic wrap. Carve the cake layers into a dome shape, stack them with frosting between layers, and insert the Barbie doll into the center.
- Frost the cake with buttercream and smooth with a spatula.
- Roll out fondant and drape it over the cake to create Barbie’s dress. Use fondant cutters to make ruffles, flowers, or bows.
- Decorate with edible glitter, pearls, or piping details. Refrigerate before serving.
Notes
Conclusion
Creating a Barbie birthday cake is more than just baking; it’s about crafting a centerpiece that brings joy and magic to a special celebration. Whether you choose a classic Barbie doll or customize the cake with another favorite character, the process is a delightful combination of creativity, effort, and love. From selecting the perfect ingredients and tools to assembling the layers, decorating with fondant or buttercream, and adding those final edible touches, every step contributes to a stunning, show-stopping masterpiece.
Remember, the beauty of a doll cake lies in its versatility. You can adapt the design, decorations, and even the type of doll to fit the theme of the party and the personality of the birthday star. Whether you go all out with intricate fondant details or keep it simple with buttercream swirls and edible glitter, your cake will surely be the highlight of the celebration.
So gather your ingredients, channel your inner artist, and enjoy the process of bringing this magical creation to life. The smiles, amazement, and excitement it brings to the table will make every moment in the kitchen worthwhile. Don’t forget to share your masterpiece with friends and family and perhaps inspire others to create their own unforgettable Barbie (or doll-themed) cakes!
Happy baking, and may your Barbie birthday cake make memories that last a lifetime! 🎂✨





Leave a Reply